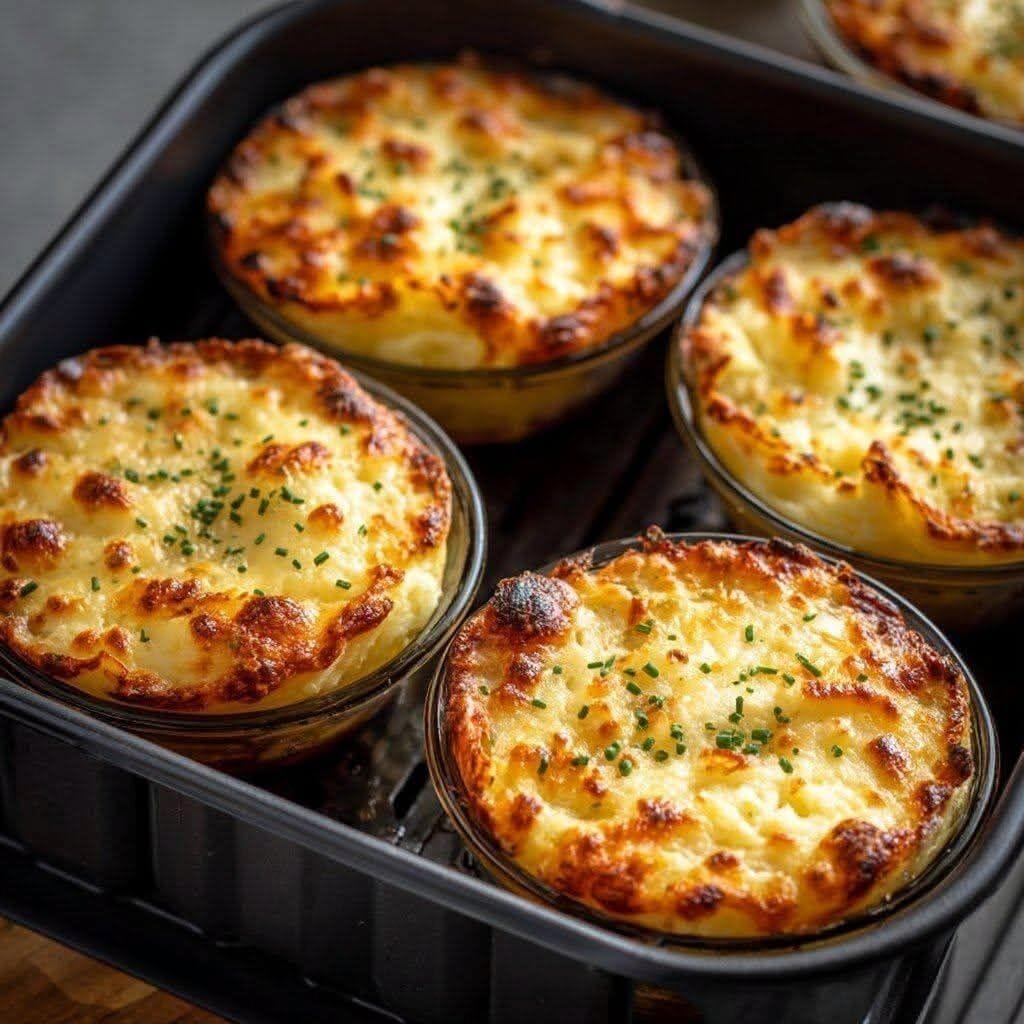
Individual Potato Gratin (Mini Potatoes Au Gratin) July 31, 2026 Individual Potato Gratin (Mini Potatoes Au Gratin) Description These Individual Potato Gratins are the ultimate comfort food, featuring layers of thinly sliced potatoes baked…
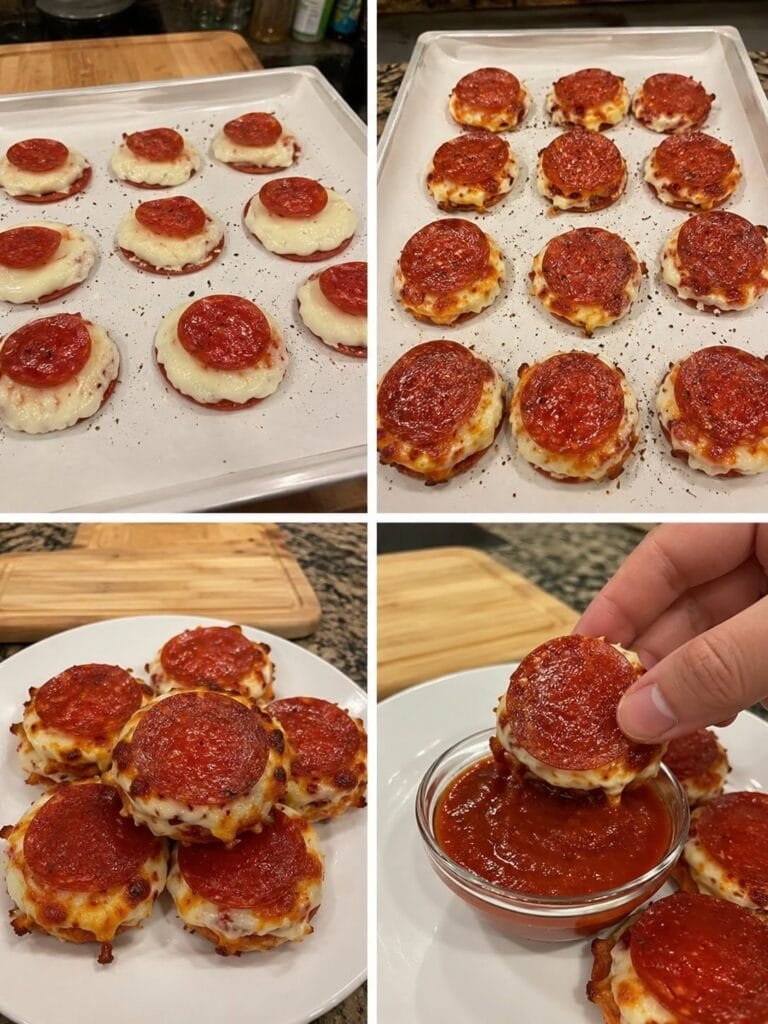
Anti-Inflammatory 16g Protein Pepperoni Pizza Bites… July 31, 2026 These Anti-Inflammatory 16g Protein Pepperoni Pizza Bites are undoubtedly one of those recipes that you quickly incorporate into your daily routine. I initially learned…
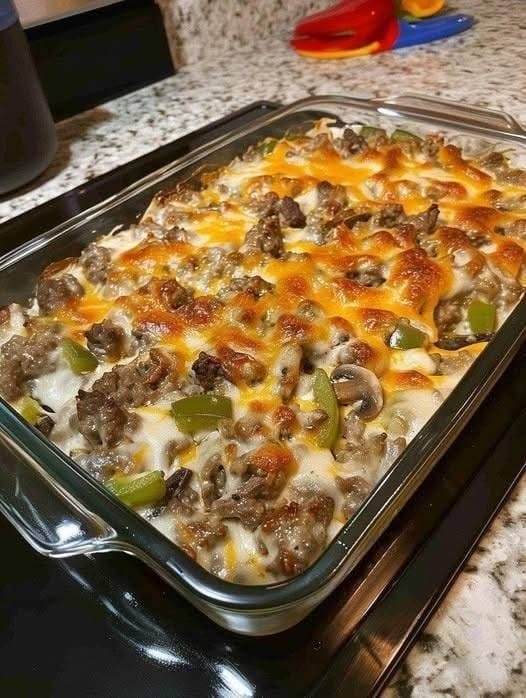
Philly Cheesesteak Casserole. July 31, 2026 This Philly Cheesesteak Casserole is undoubtedly one of those dishes that quickly become a regular part of your supper routine. My sister kept telling…
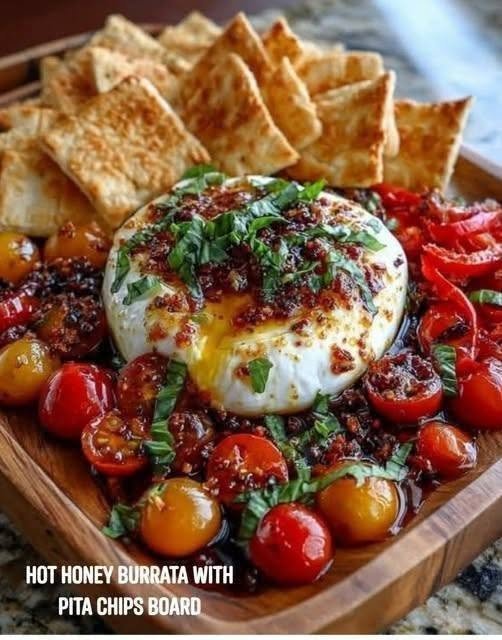
Hot Honey Burrata with Pita Chips Board… July 31, 2026 Some dishes you just make once, while others subtly become a part of your weekend rituals. For me, this Hot Honey Burrata with Pita…
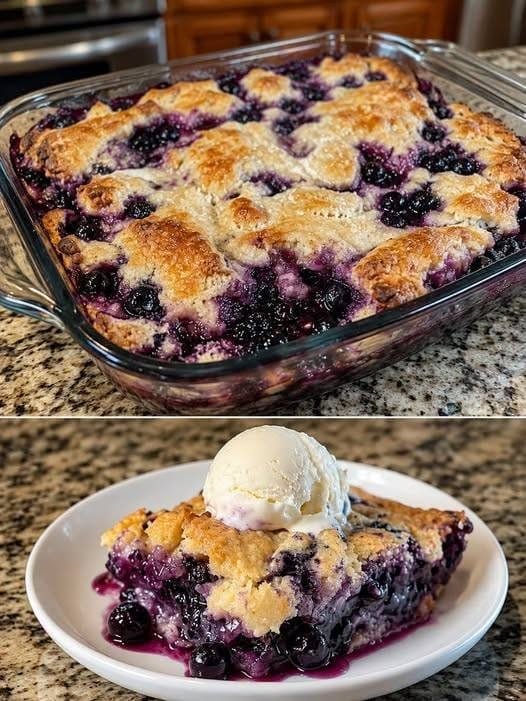
Blueberry Cobbler,,,, July 30, 2026 Everyone at the Table Some recipes create memories rather than just dessert. For me, one of those recipes is this Blueberry Cobbler. After a…
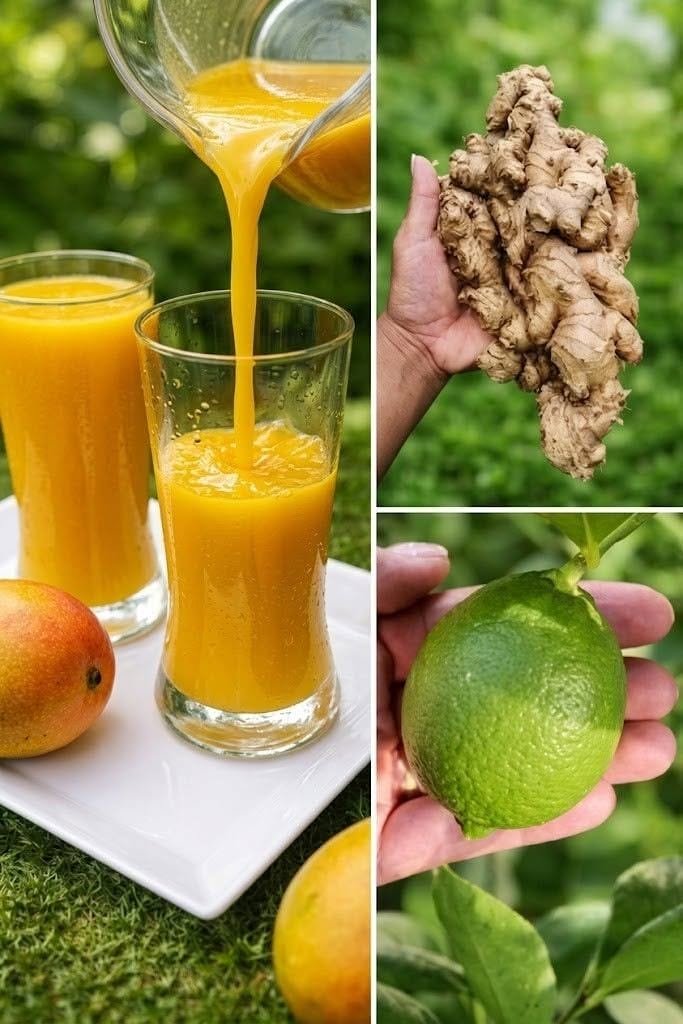
Anti-Inflammatory Mango Ginger Lime Elixir… July 30, 2026 For me, this Anti-Inflammatory Mango Ginger Lime Elixir is one of those recipes that become favourites the moment you prepare them. After a close…
Greek Lemon Chicken Pita Wraps with Dill Garlic Feta Sauce July 30, 2026 Greek Lemon Chicken Pita Wraps with Dill Garlic Feta Sauce There are some recipes that instantly become part of your regular meal rotation, and…
Guava Lime Detox Drink,,, July 30, 2026 Some recipes find their way into your life as a result of your search, while others appear out of the blue. For me, this…
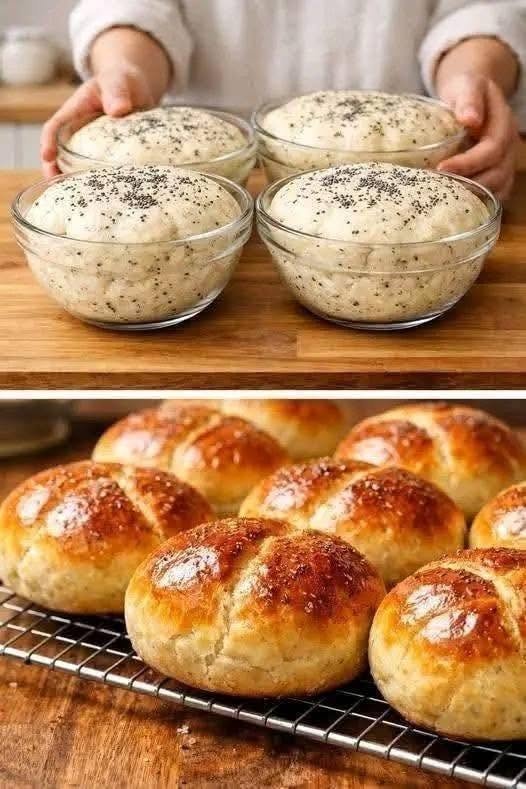
Soft Dinner Rolls… July 30, 2026 The aroma of freshly baked bread permeating the kitchen has a very reassuring quality. The house feels instantly cozier, more peaceful, and a touch…
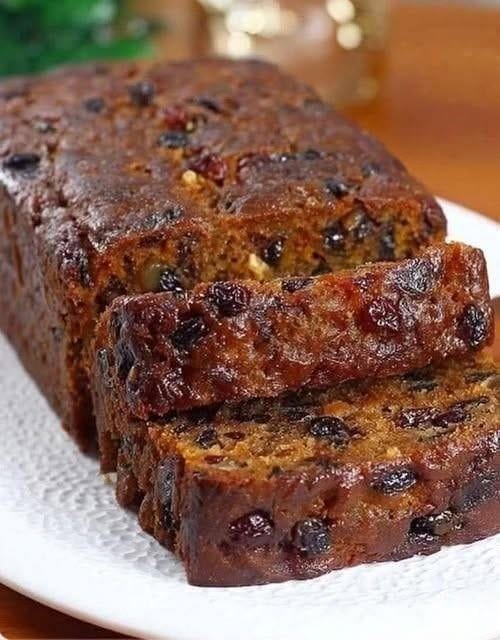
Ultimate Fruit Cake Loaf July 30, 2026 Ultimate Fruit Cake Loaf Description This Ultimate Fruit Cake Loaf is soft, moist, and packed with juicy dried fruits, crunchy nuts, and warm spices…