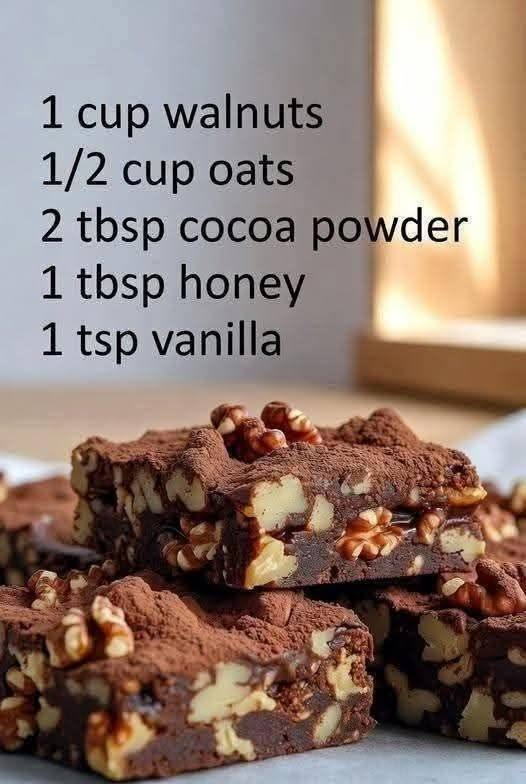
Rich, fudgy, nutty, and naturally sweetened with honey, these chocolate walnut brownies don’t require baking. They are ideal when you want a tasty chocolate treat without using the oven because they are made with just five basic ingredients. A rich, brownie-like texture with lots of crunch and a rich chocolate taste is produced by combining walnuts, oats, cocoa powder, honey, and vanilla.
This recipe is perfect for tea-time desserts, lunchbox goodies, afternoon snacks, or a quick homemade treat when you’re craving chocolate. Using a food processor, you can make everything in one bowl and then chill the mixture until it’s solid enough to cut into squares.
Recipe Details
Preparation time: 15 minutes
Chilling time: 1–2 hours
Total time: Approximately 1 hour 15 minutes to 2 hours 15 minutes
Servings: 8–10 brownie squares
Cooking method: No-bake
Difficulty: Easy
Ingredients
This recipe uses the five ingredients shown in the original recipe.
1 cup walnuts
1/2 cup rolled oats
2 tablespoons unsweetened cocoa powder
1 tablespoon honey
1 teaspoon vanilla extract
Optional ingredients for serving: A little extra cocoa powder for dusting, chopped walnuts for topping, or a small pinch of salt to enhance the chocolate flavor.
Step-by-Step Instructions
Step 1: Prepare Your Ingredients
Measure each of the five ingredients and set them on your work surface before you begin. Make sure your oats are dry and your walnuts are fresh.
For a rich, deep chocolate flavor, use unsweetened cocoa powder. Because they help absorb moisture and give the brownies a hard texture, rolled oats are particularly effective. Vanilla adds warmth and intensifies the chocolate flavor, while honey serves as a natural sweetener and aids in binding the components together.
If your walnuts are very large, break them into smaller pieces before adding them to the food processor. This makes blending easier and helps the mixture become more uniform.
Step 2: Grind the Walnuts
Add the one cup of walnuts to a food processor. Pulse several times until the walnuts become finely ground.
Avoid processing them continuously for too long, because walnuts release natural oils and can eventually turn into walnut butter. For this recipe, you want a fine, crumbly texture that resembles coarse sand.
If you do not have a food processor, finely chop the walnuts with a sharp knife and crush them further using a mortar and pestle. The texture may be slightly chunkier, but the brownies will still taste delicious.
Step 3: Add the Oats
Add the half cup of rolled oats to the ground walnuts. Pulse again until the oats are broken down into smaller pieces.
You do not necessarily need to turn the oats into a completely fine powder. A slightly textured mixture gives the brownies a pleasant bite and helps them hold their shape.
Scrape down the sides of the processor bowl if necessary so the walnuts and oats are evenly combined.
Step 4: Mix in the Cocoa Powder
Add two tablespoons of unsweetened cocoa powder to the walnut and oat mixture.
Pulse until the cocoa powder is evenly distributed and the mixture turns a consistent chocolate-brown color. Make sure there are no large pockets of dry cocoa powder remaining around the sides or bottom of the bowl.
At this stage, the mixture should look like dry chocolate crumbs. The walnuts provide richness, while the cocoa powder delivers the deep chocolate flavor that makes these brownies so satisfying.
If you prefer a more intense chocolate taste, you can add a little extra cocoa powder, but remember that too much may make the mixture drier and more bitter.
Step 5: Add Honey and Vanilla
Add one tablespoon of honey and one teaspoon of vanilla extract to the mixture.
Pulse the food processor until the ingredients begin to clump together. The honey provides sweetness and helps bind the dry ingredients, while vanilla gives the brownies a lovely aroma.
Stop the processor occasionally to scrape down the sides. Continue mixing until the mixture resembles a moist, thick dough.
Check the consistency: Press a small amount between your fingers. It should hold together rather than fall apart immediately. If the mixture is too dry and crumbly, add a little more honey, about half a teaspoon at a time. If it seems too sticky, add a small spoonful of ground oats.
Because walnuts vary in moisture and oil content, you may need a slight adjustment to achieve the ideal consistency.
Step 6: Prepare the Baking Dish
Choose a small square container or baking dish, approximately 6 × 6 inches, for thick brownie squares. A slightly larger container will produce thinner pieces.
Line the container with parchment paper, leaving a little extra paper hanging over the edges. This makes it much easier to lift the brownies out after chilling.
You do not need to grease the dish if it is properly lined with parchment paper.
Step 7: Press the Mixture into the Dish
Transfer the chocolate walnut mixture into your prepared container.
Using the back of a spoon, a spatula, or clean hands, press the mixture firmly and evenly into the dish. Pay particular attention to the corners and edges.
Compact the mixture as much as possible. Pressing firmly helps the ingredients stick together and prevents the brownies from crumbling when you cut them.
Smooth the surface with a spatula. If desired, sprinkle a few finely chopped walnuts over the top and gently press them into the mixture.
Step 8: Chill Until Firm
Place the container in the refrigerator for at least one to two hours.
During this time, the mixture firms up, allowing the natural oils in the walnuts and the honey to help hold everything together. Chilling also improves the texture, making the brownies easier to slice.
If you are short on time, you can place the container in the freezer for approximately 25–40 minutes, checking occasionally to ensure the mixture becomes firm without freezing completely.
Do not skip this step. Cutting the brownies before they have set may cause them to crumble or lose their shape.
Step 9: Cut into Brownie Squares
Once the mixture is firm, remove the container from the refrigerator.
Lift the brownies out using the parchment paper and place them on a cutting board. Use a sharp knife to cut the mixture into eight to ten squares, depending on your preferred serving size.
For cleaner edges, wipe the knife with a warm, slightly damp cloth between cuts.
If you want to recreate the cocoa-dusted appearance of traditional chocolate brownies, lightly sift a little cocoa powder over the top just before serving.
Step 10: Serve and Enjoy
Arrange the brownie squares on a serving plate and enjoy them chilled or allow them to sit at room temperature for a few minutes before eating.
These brownies have a dense, fudgy texture with crunchy walnut pieces and a rich cocoa flavor. They pair beautifully with coffee, tea, a glass of milk, or fresh fruit.
For a more indulgent dessert, serve a square with Greek yogurt or a scoop of vanilla ice cream.
Storage Tips
Store the brownies in an airtight container in the refrigerator for up to one week. Separate layers with parchment paper to prevent them from sticking together.
For longer storage, freeze the squares in a freezer-safe container for up to two months. Thaw individual portions in the refrigerator before serving.
Helpful Tips for Perfect Brownies
Use fresh walnuts: Fresh walnuts provide the best flavor and natural richness.
Blend gradually: Short pulses help prevent the walnuts from turning into butter.
Adjust the texture carefully: Add extra honey or ground oats in small amounts if needed.
Press firmly: A tightly compacted mixture produces neater brownie squares.
Chill thoroughly: Cold brownies are easier to cut and hold their shape better.


